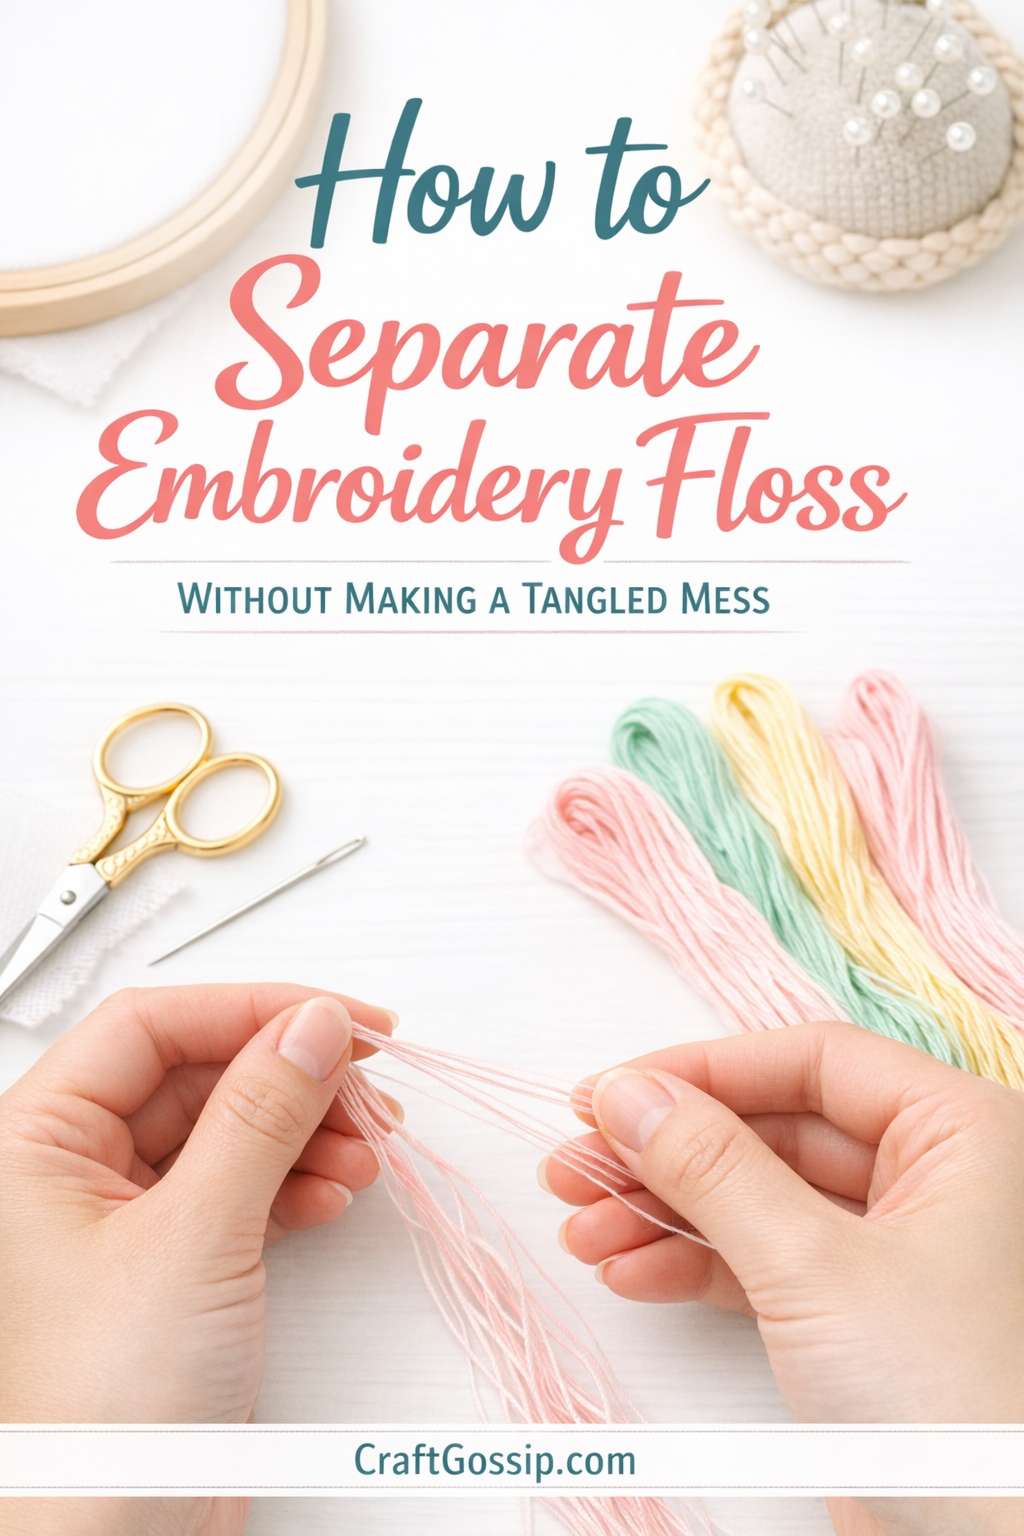
There are a few tiny craft frustrations that seem wildly unfair for how small they are. One of them is trying to separate embroidery floss and somehow ending up with a knotty, twisted, slightly aggressive little bundle in your lap instead.
You start with the best intentions. You only wanted two strands. Maybe three. Nothing dramatic. Then suddenly the thread is looping around itself, one strand is clinging on for dear life, and the whole thing looks like it has taken your simple embroidery plans as a personal challenge.
If that sounds familiar, you are absolutely not alone.
Learning how to separate embroidery floss properly is one of those basic embroidery skills that no one talks about enough. It sounds simple, and technically it is simple, but it makes a huge difference to how neat your stitches look, how smoothly the thread behaves, and how much muttering happens at your craft table.
The good news is that once you know the easiest way to do it, separating floss becomes much less annoying. Still not thrilling, mind you. But definitely less likely to send you into a tiny thread-related spiral.
Why embroidery floss needs to be separated properly
Most standard embroidery floss comes as six strands twisted together. That means when a pattern tells you to use two strands or three strands, you are meant to separate them first rather than stitch with the whole bundle.
Separating floss properly matters because:
- it helps your stitches lie flatter
- it reduces tangling while you stitch
- it gives you more control over stitch thickness
- it helps satin stitch and outline work look neater
- it stops your thread from looking overly bulky on delicate designs
If you skip this step and just use the floss as-is when the pattern calls for fewer strands, the stitches can look thick, ropey, and a bit heavy-handed.
Sometimes that chunky look is fine, especially for bold folk embroidery or playful text. But for most hand embroidery, separating the floss gives you a much cleaner finish.
How many strands should you use?
This depends on the project, fabric, and the look you want.
A very general guide is:
- 1 strand for delicate detail and fine lettering
- 2 strands for most general embroidery work
- 3 strands for bolder lines and simple floral motifs
- 6 strands for very chunky decorative stitching
If you are unsure, two strands is usually a safe starting point for standard cotton fabric.
Why embroidery floss gets tangled so easily
Embroidery floss is made to be soft and flexible, which is lovely when you are stitching and a bit less lovely when you are trying to pull it apart.
It tangles because:
- the strands twist around each other naturally
- pulling multiple strands at once can tighten the knotting
- long lengths are harder to control
- rough handling makes the strands snag and loop
- the thread still carries some twist from being wound in the skein
So if your floss keeps turning into a tiny bird’s nest, it does not necessarily mean you are doing it wrong. It usually just means the thread needs a gentler approach.
The easiest way to separate embroidery floss
This is the method I come back to again and again because it is simple and it works.
Step 1: Cut the length you need first
Start by cutting a manageable length of floss from the skein.
Around 12 to 18 inches is a good length for most stitching. Longer pieces are much more likely to tangle, fray, and make you regret your choices.
Step 2: Hold the floss near the top
Pinch the cut piece of floss near one end. You want a firm grip so the rest of the strands stay in place while you pull one strand away.
Step 3: Isolate one strand
Use your fingers to gently pick out just one strand from the six. Pull that one strand up and away slowly while holding the other five strands steady.
This bit feels strange at first because the thread bunches together as you pull, and it can look like you are making the problem worse. You are not. Keep going slowly.
Step 4: Let the bunching release naturally
As the single strand slides free, the remaining floss will bunch and twist a little. That is normal. Once the strand is fully removed, the rest of the floss will relax again.
Step 5: Repeat until you have the number of strands you need
If you need two strands, pull out one strand, then another. Once separated, lay the two loose strands together and thread them into your needle.
This is the part many people miss. The cleanest method is usually to separate strands one at a time, then recombine the number you need.
The biggest mistake people make
The most common mistake is trying to pull two or three strands out at once.
It seems faster. It feels logical. It is also usually the quickest route to a snarled-up mess.
When you pull several strands together, they tighten against the remaining strands and twist around each other more aggressively. One strand gets stuck, the others loop, and before long you are staring at your floss like it has betrayed you.
Pulling out one strand at a time is slower by about five seconds and saves a ridiculous amount of frustration.
What to do after separating the floss
Once you have separated the strands you need, smooth them out before threading your needle.
You can do this by:
- running them lightly between your fingers
- lining the ends up neatly
- letting the strands hang for a second so they untwist naturally
Then place the strands together and thread them as one.
This helps the strands sit more evenly and stops them from twisting awkwardly once you begin stitching.
Should you use thread conditioner?
Some stitchers like using thread conditioner, especially for metallic thread or very fussy floss. For regular cotton embroidery floss, it is not always necessary, but it can help if your thread feels dry, tangly, or unruly.
A little thread conditioner may help:
- reduce fraying
- make the floss glide more smoothly
- cut down on knots while stitching
That said, if you are using good-quality floss and sensible lengths, you may not need it at all. Sometimes the real fix is simply shorter thread and gentler handling, not buying another crafty gadget for the drawer.
How to separate floss directly from the skein
If you are working straight from the skein, the trick is to find the correct end and pull gently rather than yanking at random and hoping for the best.
Once you have your working length cut, separate it using the one-strand-at-a-time method above.
Trying to separate strands while the floss is still attached to the skein is usually more trouble than it is worth. Cut first, then separate.
How to keep embroidery floss from tangling while you work
Separating the floss properly is only half the battle. Keeping it neat while stitching matters too.
A few simple habits help a lot:
Use shorter lengths
This is the big one. Long thread always seems like a clever time-saver until it starts knotting halfway through a leaf.
Let your needle dangle occasionally
Every now and then, stop and let the needle hang freely so the thread can unwind itself.
Pull the thread through slowly
Fast stitching feels efficient right up until the floss knots itself into something suspiciously decorative.
Store cut strands neatly
If you pre-cut multiple colours, keep them on floss bobbins, thread cards, or project rings so they do not mingle into chaos.
Avoid rough, dry hands
Tiny snags from rough fingertips can catch the thread and make it fray or tangle more easily.
When not to separate embroidery floss
There are times when using all six strands is perfectly fine.
You might keep the floss whole for:
- chunky decorative embroidery
- bold lettering
- very simple folk-art style projects
- textured embellishment
- projects stitched on heavier fabric
So this is not a rule that says every project must use separated strands. It is just about matching the thread thickness to the design.
Best projects for practicing floss separation
If you are still getting the hang of it, start with projects that use simple stitches and only a couple of strands.
Good practice projects include:
- small floral samplers
- bookmarks
- monograms
- tiny hoop art
- lavender sachets
- simple mending details
These kinds of projects let you get used to handling the thread without the pressure of a huge complicated design.
Common floss separation problems and how to fix them
The strand keeps knotting as I pull it out
Slow down and make sure you are only pulling one strand while holding the rest firmly. Let the remaining bunching relax naturally instead of tugging harder.
My strands look crinkled after separating
Smooth them gently between your fingers or let them hang for a moment before threading the needle.
The floss frays at the ends
Your thread length may be too long, or the ends may have become rough from repeated handling. Cut a fresh piece if needed.
The strands do not sit evenly when I rejoin them
Line up the ends and stroke the strands lightly so they lie flat together before threading.
Everything still tangles
Usually this comes down to three things: thread length, pulling too many strands at once, or working too quickly.
A simple habit that makes embroidery easier
This is one of those little embroidery habits that does not seem exciting, but it quietly improves almost everything.
When your floss is separated properly:
- your needle is easier to thread
- your stitches sit more evenly
- your outlines look cleaner
- your satin stitch behaves better
- your thread tangles less often
And really, anything that reduces the amount of time spent picking knots apart with increasingly dramatic sighing is worth learning.
A gentle reminder for beginners
If separating embroidery floss still feels fiddly, that is normal. It is one of those basic skills that gets easier very quickly once your hands know what to do.
The first few times can feel awkward and a bit annoying, especially when the floss bunches up and looks like it is going wrong. But usually it is doing exactly what it should. Go slowly, pull one strand at a time, and trust the process a little.
Before long you will be doing it without thinking, which is both convenient and slightly irritating considering how mysterious it seemed at the start.
Why this little trick matters more than people think
Embroidery is full of tiny skills like this. Nothing dramatic. Nothing flashy. Just small practical things that make the whole process smoother and more enjoyable.
Separating floss properly is one of them.
It will not make your tea, organise your thread stash, or stop you buying yet another pretty shade of pink you absolutely did not need. But it will make stitching easier, neater, and a whole lot less tangly.
And honestly, in the world of embroidery, that is a fairly solid win.
Leave a Reply